How to Use Canva for Editing Video (Beginner’s Guide 2025)
Creating videos used to require heavy software like Premiere Pro or Final Cut Pro — but not anymore! With Canva, you can edit professional-looking videos online easily, even if you’ve never edited before. how to use canva for editing video
In this blog, you’ll learn how to use Canva for editing videos, step by step — from adding clips to applying effects, music, and animations. Let’s dive in!
What Is Canva Video Editor?
Canva isn’t just for posters or Instagram posts — it’s now a powerful video editing tool too.
You can create, trim, cut, merge, and animate videos directly in your browser. It’s simple, fast, and perfect for social media content, YouTube intros, Reels, or promotional videos.
✅ No downloads needed
✅ AI-powered tools (Magic Edit, Beat Sync, Text-to-Video)
✅ Thousands of video templates
✅ Royalty-free music & stock videos
Step-by-Step Guide: How to Use Canva for Editing Video
Let’s go step by step
Step 1: Log in and Create a New Video Project
- Go to canva.com.
- Click on “Create a Design” → “Video.”
- Choose your video size (e.g., 1920×1080 for YouTube or 1080×1080 for Instagram).
Canva will open its video editor workspace, where you can start customizing your video.
Step 2: Upload or Select Video Clips
You can either:
- Upload your own clips (from your phone or camera), or
- Use free stock videos available in Canva’s library.
Click on the “Uploads” tab → Upload Files, or choose from Videos → Free Stock Library.
👉 Pro tip: Use short, clean clips for better storytelling.
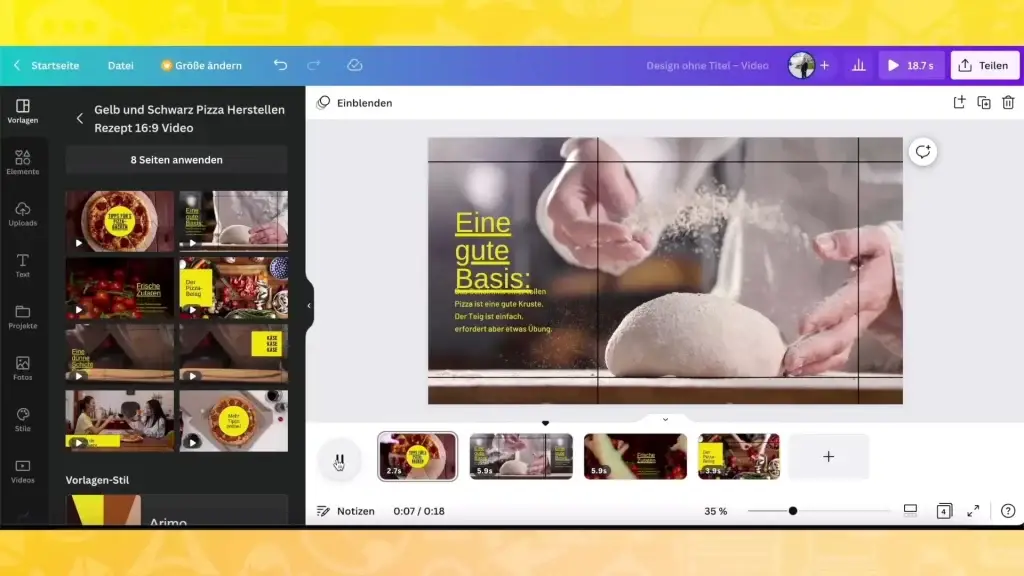
Step 3: Arrange and Trim Your Video Clips
Once your clips are on the timeline:
- Drag and drop them in the right order.
- Click on a clip → use the trim handles to shorten or remove unwanted parts.
You can also split clips using the “Split” (scissors icon) to make clean cuts.
🎯 SEO tip: When trimming, think of the viewer — keep your videos short, engaging, and story-driven.
Step 4: Add Text and Animations
Make your video pop with stylish text and transitions:
- Click “Text” → Add Heading / Subheading.
- Choose fonts that match your brand style.
- Add animations like “Fade,” “Pop,” or “Slide.”
Use Canva’s motion effects to make your text move with the video. Tip for professionals: For branding, put your website name or logo watermark at the bottom.
Step 5: Add voiceovers, music, and sound effects
Click on “Audio” in the menu on the left.Canva has:
🎵 Free background music
🎤 Voiceover recording (you can record right in Canva)
🔊 Sound effects like clicks, whooshes, and background sounds
Beat Sync (Pro feature) automatically adjusts clips to the beat of your music so that they match video transitions.
Step 6: Use AI tools to make editing easier
Canva’s AI tools make it a lot easier to edit videos:
- Magic Edit lets you change certain parts of a clip with AI.
- Magic Write: Make up captions or script ideas.
- Text-to-Video: Make short AI videos from text prompts.
Step 7: Add Transitions and Effects
Between your clips, click the “+” sign → choose Transition.
You can pick from effects like:
- Fade
- Slide
- Circle Wipe
- Match & Move
Smooth transitions make your video flow naturally and look more professional.
Step 8: Export and Download Your Video
Once you’re happy with your edit:
- Click “Share” → “Download.”
- Choose MP4 video format.
- Select HD quality (1080p) for best results.
That’s it! Your Canva video is ready to upload on YouTube, Instagram, or any platform.
💡 Bonus Tips to Make Your Videos Stand Out
- Keep your video under 60 seconds for Reels or Shorts.
- Use bold text and clear visuals for better engagement.
- Add subtitles — most people watch videos on mute.
- Maintain consistent brand colors and fonts.
- Experiment with Canva’s video templates for inspiration.